


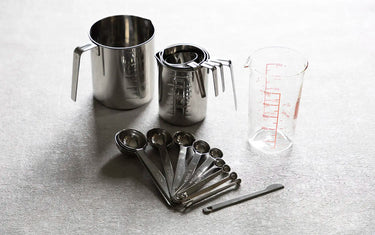
The products we used:


Consistency is Key

This might seem like a strange question for the representative of Globalkitchen Japan to ask, but why do you think people like McDonald’s and Starbucks so much? When I, my wife, and my kids go to the US to see my parents, we have a layover in Taiwan, and there we always go to the McDonald’s and the Starbucks in the airport–both full of customers. Why do they have such universal appeal?
The obvious answer is “Because they taste good.” Yes, but how do they taste good all the time, no matter where in the world you go? It’s pretty crazy that a double quarter-pounder with cheese tastes the same in Taiwan as it does in Japan as it does in America!
Their success is because of their consistency, and their consistency is a product of measuring.
My Morning Brew

This morning, at about 3:30AM, I woke up, measured out 4 cups of water and 1.5 tablespoons of ground coffee to make my morning brew. But I’m not a fan of black coffee, so while my coffee maker was working, I measured out a tablespoon of heavy cream, a tablespoon of artificial sweetener (Keto diet), and 1/4 teaspoon of table salt (enhances flavor, reduces bitterness, boosts hydration), and about 2 tablespoons of milk. It’s a formula I’ve developed after considerable experimentation with other measurements. Measuring the salt is especially important: too much salt and I am drinking ocean water, too little and the coffee feels weak and empty.
I then pour the coffee into the mug, filling it up to the maximum amount it can be comfortably filled.
And every morning, my coffee is exactly the way I like it.
That’s the power of measuring: consistent results, every time.
So now–after passing on the wisdom of measuring–we at Globalkitchen Japan would like to pass on the knowledge of how to measure properly to you, our handsome and intelligent customers.
Measuring Wet Ingredients
With Measuring Cups


Let’s begin with wet ingredients. When measuring out wet ingredients in a measuring cup, begin by placing the cup on a flat, level surface. If you have a glass measuring cup, fill it all the way up to the necessary amount. Need one cup of soy sauce? Pour it all the way up to the one cup line. You can look at glass measuring cups from the side to see the amount you measure at eye-level, but if use metal cups then you need to look down at the inside of the cup to see when the liquid reaches the line.
With Measuring Spoons


For spoons, the hard part is simply holding the spoon level to ensure that your measurement is accurate. When pouring liquid into the spoon, take it slow to avoid overfilling the spoon since it can be tough to return the excess liquid back into its original container. If you don’t trust your shaky hands, you can place a small bowl under the spoon to catch excess liquid.
Some spoons have flat bottoms and come with a special “foot” on the handle–allowing the spoons to sit flat on the counter, making it easy to measure accurately. If you can’t find those, you can also buy spoons with extra-long handles, allowing you to lay the spoon’s handle flat on a cup or bowl and measure out liquid without the spoon falling down.
Measuring Dry Ingredients
With Measuring Cups


When measuring dry ingredients, fill the cup to overflowing and then scrap the excess off with a knife. Be careful, though. Ingredients like bread flour naturally contain some amount of air, which is the source of its fluffy consistency. Recipes rely on that fact when they provide measurements. Thus, when measuring out dry ingredients, you should never pack them unless the recipe tells you to. Don’t use force to push down the flour. Also, don’t “tap” or shake the flour, as that can also have the effect of releasing some of the air in the flour, leading to a dry end-result. If your cup is larger than the amount you need to measure out, use a fork to stir and level the dry ingredient to get the most accurate measurement possible.
With Measuring Spoons

Measuring dry ingredients with spoons is much less complicated: fill the spoon, then scrape the excess off with a knife or spoon. Measurements with spoons need to be especially accurate: A little too much salt, oregano, or garlic powder can drastically alter the flavor of the food.
Units of Measure
We at Globalkitchen Japan do our best to provide both metric and American Imperial measurements so that anybody can enjoy making Japanese food, but if you’re looking at other recipes online or in a cookbook, you might need to do some unit conversions. I know I was confused when I first started cooking with Japanese recipes because I was used to American imperial measurements and Japan uses metric measurements (“What the heck is a cc?”). Today, you can use AI to do the conversions for you, but if you don’t have the time or ability to get help with unit conversions, you can get by with a knowledge of some common unit conversions. Below is a table of those common conversions.
Table of Unit Conversions
| Measurement Type | Metric | American Imperial | Notes |
|---|---|---|---|
| Weight | 100 grams (g) | 3.5 ounces (oz) | Approx. weight of 1 stick of butter (113g). |
| Weight | 1 kilogram (kg) | 2 pounds (lb) | Used for larger quantities (e.g., meat). |
| Weight | 28 grams (g) | 1 ounce (oz) | Standard ounce for dry ingredients. |
| Weight | 450 grams (g) | 1 pound (lb) | Common for flour, sugar, etc. |
| Volume | 1 milliliter (mL) = 1 cc | 0.034 fluid ounces (fl oz) | Small liquid measurements (e.g., extracts). |
| Volume | 5 milliliters (mL) = 5 cc | 1 teaspoon (tsp) | Standard for small liquid or dry ingredients. |
| Volume | 15 milliliters (mL) = 15 cc | 1 tablespoon (tbsp) | 3 teaspoons = 1 tablespoon. |
| Volume | 100 milliliters (mL) = 100 cc | 3.5 fluid ounces (fl oz) | Approx. 1/2 cup minus 2 tbsp. |
| Volume | 240 milliliters (mL) = 240 cc | 1 cup (c) | Standard cup for dry or liquid ingredients. |
| Volume | 500 milliliters (mL) = 500 cc | 2 cups (c) | Slightly more than 2 cups. |
| Volume | 1 liter (L) = 1000 cc | 4 cups (c) | Approx. 1 quart (4 cups). |
| Volume | 1 liter (L) = 1000 cc | 1 quart (qt) | Common for large liquid measurements. |
| Volume | 4 liters (L) = 4000 cc | 1 gallon (gal) | Used for bulk liquids (e.g., milk). |
Notes:
- Cubic Centimeters (cc): 1 cc = 1 mL, so cc measurements are equivalent to milliliters and can be used interchangeably in cooking.
- Weight Conversions: For precise baking, use a kitchen scale to measure weights (e.g., 1 cup of all-purpose flour ≈ 120-125g, but can vary by packing).
- Volume Conversions: American imperial cups and spoons are standardized (1 cup = 8 fl oz). Metric volumes (mL/cc) are exact.
- Dry vs. Liquid: Use dry measuring cups for ingredients like flour (spoon and level, don’t pack unless specified) and liquid measuring cups for liquids (check at eye level).
- Rounding: Conversions are rounded for practicality. For exact measurements, use a calculator or scale.
- Common Ingredients: Specific ingredients may vary (e.g., 1 cup brown sugar, packed ≈ 200g; 1 cup granulated sugar ≈ 200g).
Remember that these are approximate measurement conversions. For the best results, you should measure precisely. But, if you’re comfortable with a casual cooking experience, then using approximate measurements is a valid choice.
Rethinking the fundamentals
If you’re in the market for fundamental tools like measuring cups and spoons, you might also be interested in our full lineup of measuring tools or a a rice storage container with a measuring cup to get consistently delicious rice. That pairs well with a convenient rice cleaning and straining bowl.
