


Products in this article:


Have you ever had Oyakodon (Chicken and Egg rice bowl)?
Rice bowls including Gyudon (beef rice bowl) and Tendon (Tempura rice bowl) are popular not only among Japanese but only among foreigners. Especially, some people are particular about Oyakodon.
Today we are going to introduce a recipe of authentic Oyakodon.
Ingredients

In Japanese, “Oyako” means “parent and child”, so in Oyakodon chicken is a parent and egg is a child. Other ingredients include onions and Japanese noodle soup base.
When the egg is overcooked, it will be dry and crumbly. It is important to cook the egg for an appropriate time so that it gets fluffy and moist.
Followings are the ingredients for 3 servings.
- 1 piece (one leg) of chicken thigh (one leg)
- 6 eggs
- 1 onion (small size)
- 80mL of Mentsuyu (Japanese soba soup base; 3 times concentrated type)
- 150 mL of water
- Mitsuba (Japanese parsley; if applicable)
How to Cook
1. Cut the ingredients

Slice the onion crosswise into 5 mm strips. Chop the chicken into bite-size chunks. Beat the egg in advance. Mix Mentsuyu and water.
2. Boil the onion strips

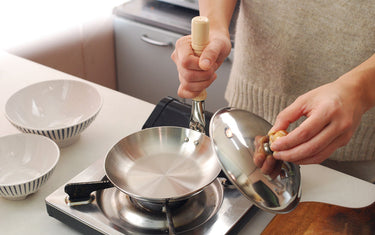
Oyakodon pan is a must for cooking Oyakodon. When cooking Oyakodon, in principle, one serving is cooked at a time. First boil the onion strips in diluted Mentsuyu (one third of the entire amount for one serving).
3. Add the chicken chunks

When the onion strips get well cooked, add the chicken chunks and cover with a lid. Then steam them for 2 minutes and proceed to the next step when the chicken chunks are ready.
4. Add the beaten egg

Pour half a ladle of beaten egg evenly and cover with a lid to steam again. After 1 minute, open the lid to add further one third ladle of beaten egg. Cover with the lid and turn off the heat to wait for 1 minute. In order to make the finish looks beautiful, it is important not stirring after adding the beaten egg.
5. Serve in a bowl

When the egg gets half solid, let it slide onto the rice in a bowl. Add Mitsuba (Japanese parsley) on the top if you’d like.
Heat control is a key when cooking Oyakodon.
It would be hard to control the heat until you get familiar with it. As egg protein is likely to be solid even in residual heat, it would be good to turn off the heat a little earlier.
Let’s cook authentic Oyakodon with Oyakodon pan!
